Monday 9 July 2012

Pictish Curragh, Part 2


OK, with a couple of sets of photocopied plans, it's time to get a start. To plunge-mould the hull, I'll need a master. Here goes!

First, I cut a nice piece of 20mm thick straight-grained timber a bit longer than the longest dimension of the hull, trying to avoid knots wherever possible.

 Timber blank, ready to go

Next, I glued a deck plan onto the top, and drilled two small holes, at a couple of marked points.

Blank with top plan in place

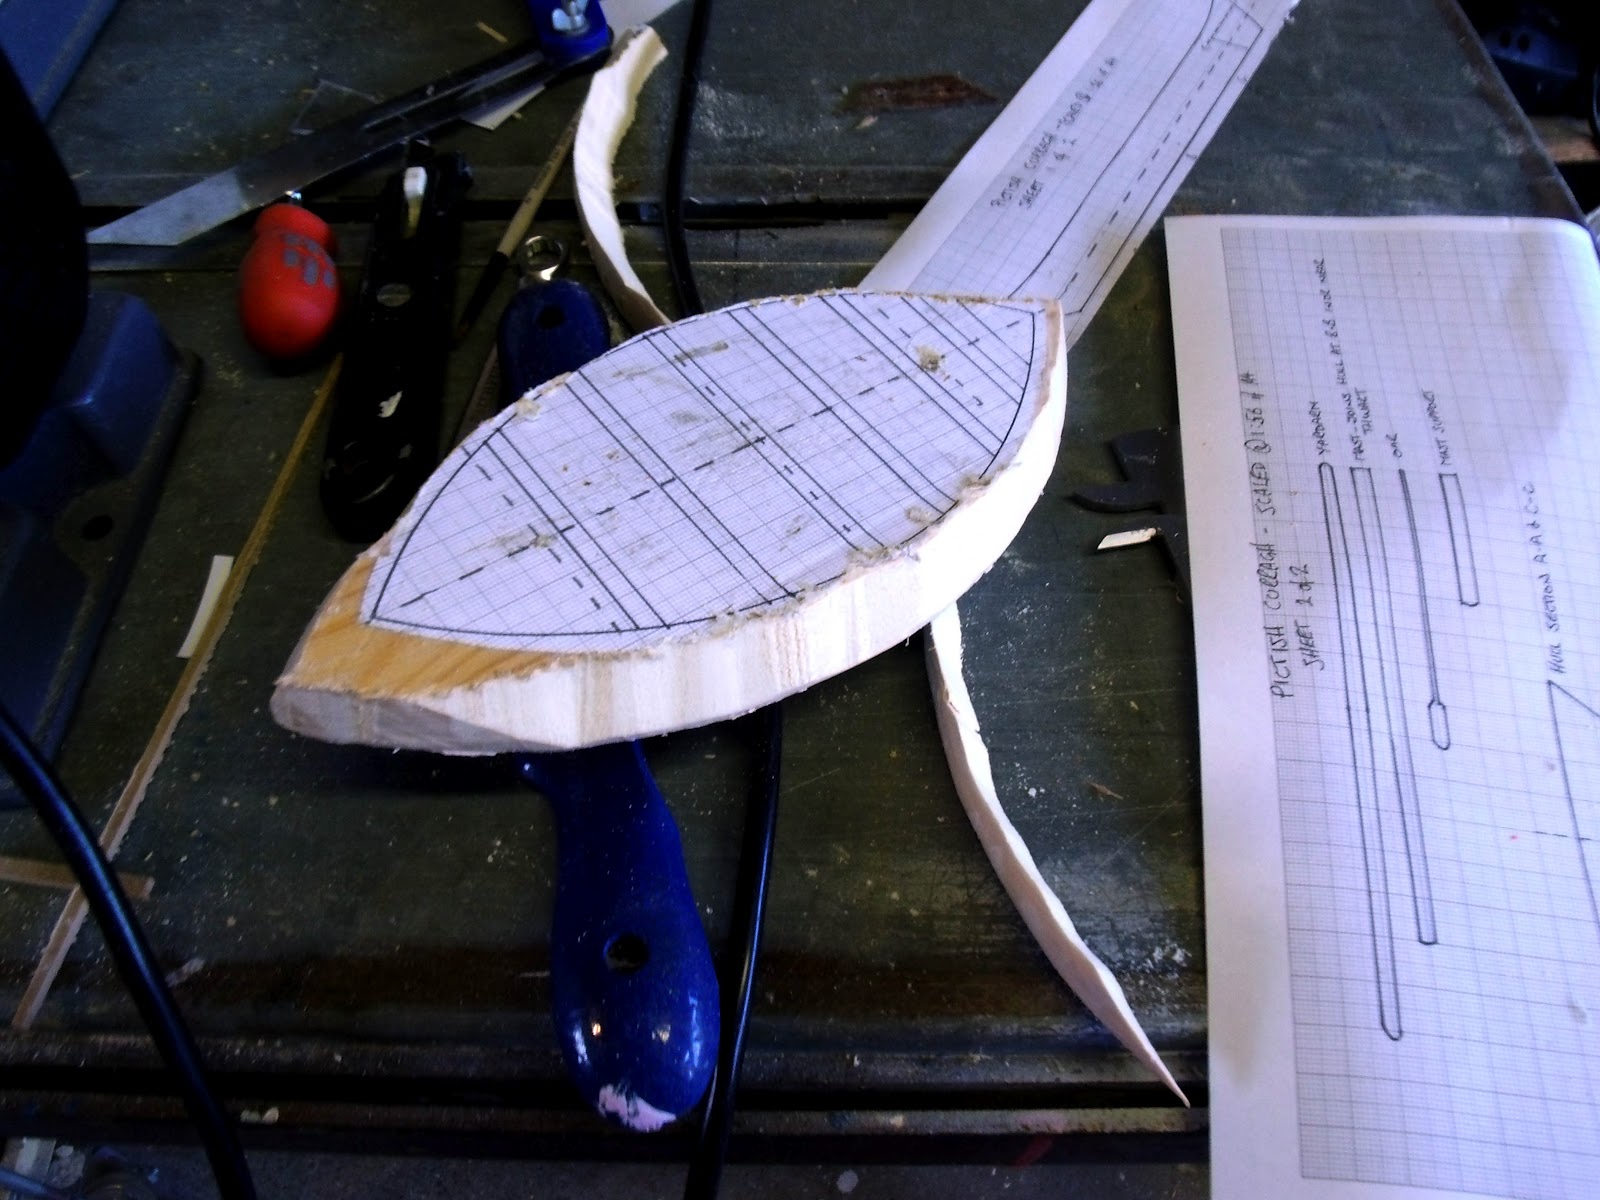
Where these points are doesn't matter, (I picked where the hull contour lines met the centre line) provided they're lined up on both bits of the plan. They allow you to line up the second bit of plan (glued to the bottom of the timber), by putting a couple of cocktail sticks through the timber, and spiking them through the corresponding points on the bottom plan. This has the effect of allowing you to ensure that critical things like the centre line of the hull are perpendicular.

Bottom plan, arrows show location pins

So, with the plans glued in place, it's time to rough out the hull. I used my scroll saw, as it's quick and easy, but a fret saw will serve. The first cuts are to form the outline - aim to just leave the line, so there's a little wood to work back to.

Cut in progress...

...And finished!

Next, using a sliding bevel on the plans, I set the table on the saw to allow me to rough out the hull sides. By setting this to the shallowest angle, there's no change of over-cutting the hull, especially if you stay well back from the gunwale area. You can miss out this step and go straight to carving, but it's easier to de-bulk the wood like this first if you can.

Set the angle...

...And make the cuts!

From a rough-cut hull, it was a case of working gradually with planes and spokeshaves to shape the hull. If the tools are sharp, it's pretty quick work. Doing it over a bin made cleaning up a doddle! Keep checking the hull shape, regularly. The sections drawn on the plans will act as a guide, but it must be symmetrical! The symmetry is much more important that the actual shape you get. Remember to keep doing this at all stages from now on.

Getting shipshape now.

I got to a point where I had to abandon the edged tools and go over to a rasp for final shaping and removing toolmarks.

 Now that's what I call rough!

Now, some sanding, to get a really smooth finish. The random orbit sander made short work of this. Every home should have one, and not just for modelmaking, either!

 A proper smoothie!

The more observant among you may have noticed above that I managed to gouge a deep notch in one side of the hull with the spokeshave. For the people who were making a cup of tea at the time, here's a replay, with the PM8 acting as pointer.

Oh dearie me!

Annoying, but not insurmountable. The best stuff for fixing these sorts of problems, I've found, is some sort of two-pack wood filler, like this one. Now, this stuff is at the obnoxious end of the scale as far as modelling materials go, particularly from a safety perspective. Both components are irritants, and it absolutely must be used in a well-ventilated area, or the fumes will whisk you away to Dingley Dell in no time flat!

The remedy for holes...

While I had some mixed it up, I also took the opportunity to fill a knot that wasn't apparent until I cut into the timber. The advantages of this stuff are that it doesn't shrink, it doesn't crumble and it's gone off ready to make progress on in about 15 minutes.

Problem solved!

A bit more sanding, and it was job done. This whole stage took about an hour overall, including the waiting time for the filler.

Job's a good 'un!

Enjoy!

Sunday 1 July 2012

Pictish Curragh, Part 1

This is going to be a long, rambling set of posts. It's likely to be a big job, and I'm pretty sure that there will be a number of points at which I am going to ask myself if I should have just bitten the bullet and bought a Gripping Beast resin version!

A build like this obviously has to start with the hull. As usual, there are several possible ways to approach this.

1 Carve it from a solid block of timber. I don't think foam would work - it lacks the rigidity, so it's a timber job. The upside is that this would be cheap. On the other hand, it's going to be almost impossible to get anywhere near a realistic, in scale thickness for the hull, and it would be incredibly easy to crowd a chisel through the thin sections and ruin the whole thing as you go, so I'm forgetting this.

2 Built it like the real thing. I actually considered this, then asked myself if I had gone insane. The curragh is a framework of timber (possibly laths and battens, possibly wickerwork), with some larger timbers and a layer of tarred hide over the outside. The end result might be realistic, but I suspect it would last a fast five minutes on the gaming table, and the intricacy of the build would be soul-destroying.

3 Mould the bloody thing! Two possible ways occur. Each starts by building an outer form for the hull by carving it from timber (see 1 above). Since there is no reason to hollow out the hull, it's much simpler and much stronger this way. Then, either plunge mould the hull from sheet styrene (the way I used to make replacement canopies for model aircraft in the days when giants walked the earth), or use glass fibre matting and resin.

The former potentially gives a weaker hull, and it will need a LOT of internal detail added from stretched sprue / microstrip, but it's easy, and the methods and materials are relatively innocuous. The glass fibre version will be stronger, and will have the advantage that the glass scrim will resemble a woven inner structure. However, it's ghastly stuff to work with, and the possibility that the hull won't release from the mould is very real - and very difficult to remediate.

Anyway, before all of that, I needed a set of plans, so here they are. Printed at full scale (A4), with the main grid lines set at 10 mm, these are good for 28 mm minis. Adjust the scaling as necessary for (eg) 15 mm.


There wasn't a cat in hell's chance of it all going on one sheet, so the hull is on one and the rest is on the other. Note that the mast, mast support, yardarm etc don't have any allowance for tenons to join them to each other and the hull!  It isn't abundantly clear exactly how the mast is stepped. The lightness of the structure seems to indicate something other than the huge block of timber (kerling) used on Viking longships. I've had a good look at pictures and plans of Inuit umiaks, which are structurally similar, and there just seems to be a hole in the thwart and a corresponding hole in the keelboard, and the mast just drops in, which look a bit hit and miss if you ask me!

Anyway, that's enough to be going on with. Enjoy!